What you need:
- Self-drying clay
- A clean bottle
- 2 glass vases
- Cutting board
- Roller
- Aluminium foil
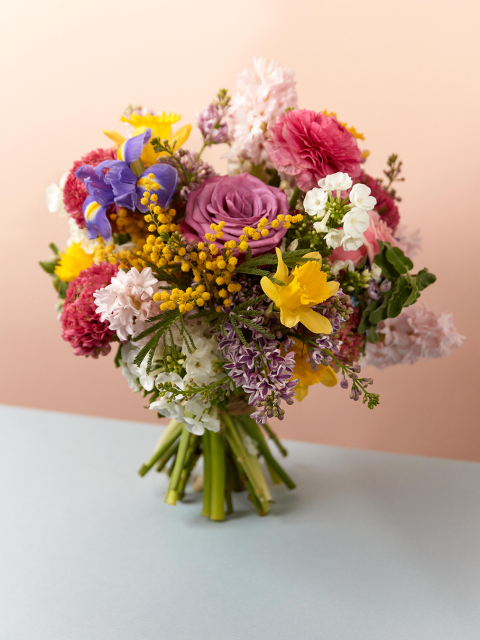
- Peonies
- Other flowers, we used: lilies, lathyrus, delphinium, veronica, bupleurum and rhodante

How to make it
Step 1
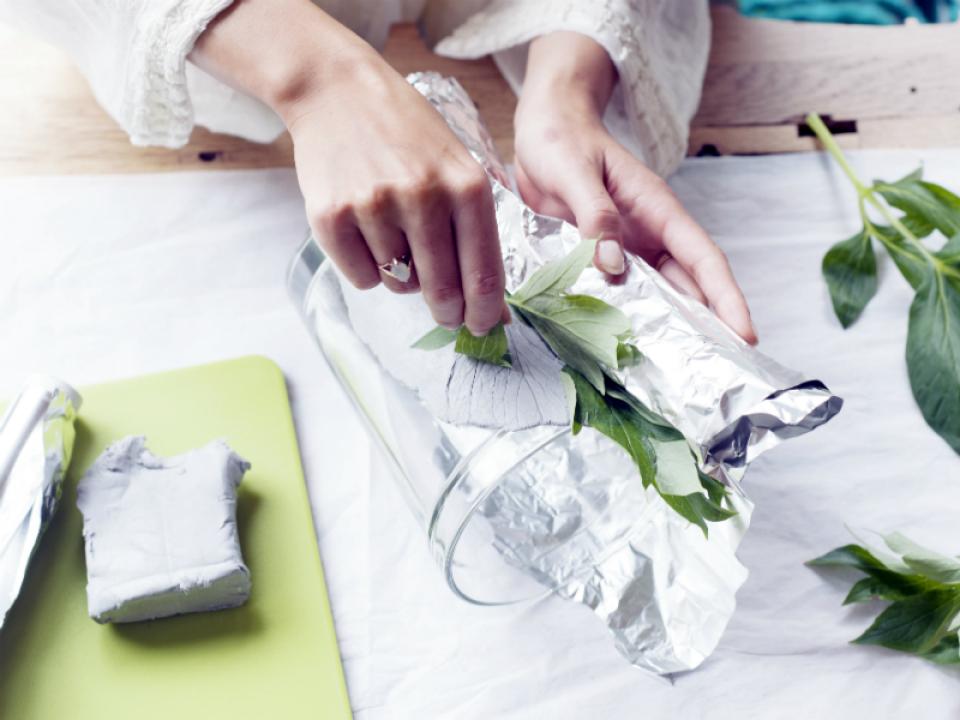
Unroll the aluminium foil on the cutting board, and place a leaf with lots of structure - like a peony leaf - on top. Roll the clay out on this until it’s a thin layer approximately 7 mm thick.

Step 2
It looks best if the clay covers around 3/4 of the vase. Take account of this when you’re rolling out the clay. Wrap the clay around the vase and remove the foil and the leaf.
Step 3
Cut and arrange the flowers, fill the vase with water and place the bouquet in your new vase with its temporary summer jacket. A new look in 10 minutes!

The next step
If you want something truly different, you can make a whole new vase out of the self-drying clay. You can use the existing vases as a mould. Or alternatively you could opt for entirely new shape - let your imagination run wild.
We’d love to see the finished product! Share it with us on Facebook or Instagram.